Table of Contents
Chicken Musubi is a healthy twist on the classic Hawaiian snack. It combines tender chicken, sticky rice, and nori for a delicious, portable bite. Whether grilled, teriyaki-glazed, or spicy, chicken musubi is easy to make and customize. Perfect for lunch, snacks, or parties, it’s a must-try!
What Is Chicken Musubi?
A Modern Twist on a Classic
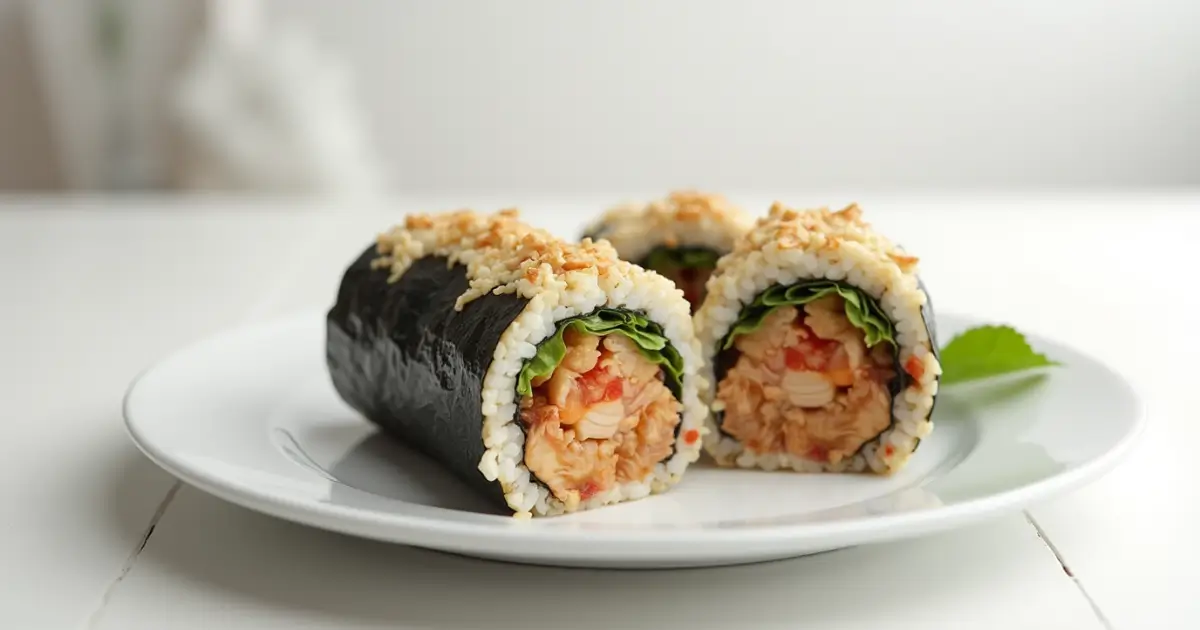
Chicken musubi layered with sticky rice and wrapped in nori. It’s a healthier, fresher version of the classic, perfect for anyone wanting comfort food with a lighter twist.
Why Chicken Makes the Better Musubi
Chicken is leaner, more versatile, and fresher. It can be seasoned to fit any craving, from teriyaki to spicy, while still offering the same musubi experience.
Ready to make it? Let’s gather the ingredients and get started!
Ingredients for Chicken Musubi
Musubi, but make it healthy! We’re swapping out heavy sauces and processed meats for clean, flavorful ingredients that still pack serious taste. Here’s everything you need to get rolling.
Essential Ingredients
These wholesome basics form the heart of your musubi:
- 2 cups cooked brown sushi rice (or short-grain white rice if preferred)
- 2 boneless, skinless chicken thighs (or chicken breast for even leaner bites)
- 1 tablespoon low-sodium soy sauce
- 1 tablespoon rice vinegar
- 1 teaspoon maple syrup or honey (a natural touch of sweetness)
- 2 full nori sheets, cut in half
- 1 teaspoon olive oil or avocado oil (for light cooking)
This foundation is simple, balanced, and built for flavor without the guilt.
Recommended Chicken Marinades
Healthy doesn’t mean bland — your chicken can still shine. These light marinades are packed with flavor and smart on calories:
Light Teriyaki Marinade (lower sugar, full taste):
- 1 tablespoon low-sodium soy sauce
- 1 teaspoon maple syrup
- 1 teaspoon rice vinegar
- 1/2 teaspoon grated garlic
- 1/2 teaspoon grated ginger
Citrus-Garlic Marinade (bright and zesty):
- Juice of 1 small orange or lemon
- 1 teaspoon olive oil
- 1 teaspoon minced garlic
- 1/2 teaspoon smoked paprika
- A pinch of salt and pepper
Let your chicken soak up those good vibes for 30 minutes or more, then grill or sear lightly until fully cooked.
Optional Add-Ins for Extra Flavor
Want to boost nutrition and taste? These healthy extras are worth the add:
- 1 tablespoon toasted sesame seeds (for crunch and healthy fats)
- 4 thin avocado slices (fiber + creamy goodness)
- 2 tablespoons pickled red cabbage or cucumber (low-calorie, gut-friendly)
- 1 tablespoon Greek yogurt-based sriracha sauce (protein-packed spice)
How to Make Chicken Musubi (Step-by-Step)
Ready to roll? Making chicken musubi is easier than you think — and once you get the hang of it, you’ll want to keep a batch on hand at all times. Let’s break it down, one tasty step at a time.
Step 1 – Cook the Rice
- Rinse 1 cup of short-grain or sushi rice until the water runs clear (this keeps it from getting gummy).
- Cook it according to your rice cooker or stovetop method.
- Once done, fluff it gently and let it cool slightly.
- Mix in 1 tablespoon rice vinegar and ½ teaspoon maple syrup or honey for a subtle tang and sweetness.
Let the rice chill out for a bit — it needs to be warm, not hot, for the rolling stage.
Step 2 – Prepare the Chicken
- Slice 2 boneless, skinless chicken thighs or breasts into musubi-sized pieces.
- Marinate with your choice of healthy mix (try a citrus-garlic or light teriyaki — you know, flavor without the fuss).
- Cook in a nonstick skillet with 1 teaspoon olive oil over medium heat until golden and fully cooked.
Let it rest a minute, then slice into strips if needed. Juicy chicken = happy musubi.
Step 3 – Shape and Assemble the Musubi
- Place a strip of plastic wrap on your counter or use a musubi mold if you have one.
- Layer in about ½ cup of rice, pressing it into a firm rectangle shape.
- Add a slice or two of cooked chicken on top — don’t be shy with that flavor.
- Want to level up? Add a thin slice of avocado or a dash of furikake here!
Step 4 – Wrap with Nori and Serve
- Place a halved nori sheet shiny-side down.
- Position your musubi block near the bottom edge, then roll it up like a pro sushi chef.
- Use a little water to seal the edge and hold it all together.
- Let it sit for a few minutes to set, then slice (or eat it whole — no judgment).
Popular Variations of Chicken Musubi
Once you’ve mastered the basics, it’s time to let your taste buds run wild! Chicken musubi is like your favorite outfit — you can dress it up, add some spice, or keep it classic. Here are some popular spins to keep things interesting:
Teriyaki Chicken Musubi
The classic crowd-pleaser.
Think juicy chicken glazed in a naturally sweetened teriyaki sauce — not too salty, not too sugary, just right. Made with low-sodium soy sauce, a touch of maple syrup, and a kiss of garlic and ginger. It’s like a hug wrapped in nori. Bonus points if you drizzle a little extra on top before serving!
Spicy Chicken Musubi
For those who like it hot (or just mildly sassy).
Toss your cooked chicken in a mix of sriracha and Greek yogurt or avocado mayo. Add a slice of jalapeño or pickled radish if you’re feeling bold. It’s fiery, creamy, and dangerously addictive — basically the bad boy of the musubi world.
Grilled vs. Fried Chicken Musubi
- Grilled chicken brings the smoky, healthy vibes — perfect for meal prep and backyard musubi magic.
- Lightly pan-fried chicken (in olive or avocado oil) gives a crispy edge without diving into deep-fried territory.
Tips for the Best Chicken Musubi
So you’ve got your ingredients, you’ve got your groove — now let’s make sure your chicken musubi turns out legendary. These tips will help you roll like a pro (even if it’s your first time!).
Choosing the Right Rice
Not all rice is created equal — especially when it comes to musubi.
Go for short-grain or sushi rice. It’s sticky, squishy, and holds its shape like a champ. Brown sushi rice works great for a healthier twist! Just rinse it well before cooking, and season it lightly with a mix of rice vinegar + a touch of sweetness (hello, maple syrup or honey) for that subtle zing.
Avoid basmati or jasmine — they’re tasty, but way too independent to hold hands with nori.
Using a Musubi Mold (or DIY Options)
A musubi mold? Fancy. But not required.
If you have one — great! It’ll give you those perfectly uniform blocks every time. If not, no stress. Use a mini loaf pan, or even your hands and a little plastic wrap to press everything into shape. The trick is to keep it compact, not crushed.
Bonus DIY tip: fold up a strip of parchment paper and use it as a homemade “press” to squish the rice and chicken evenly.
Storage and Reheating Advice
Made too many? First of all, high five. Second, here’s how to keep them fresh:
- Wrap each musubi tightly in plastic wrap or beeswax wrap.
- Store in an airtight container in the fridge for up to 2–3 days.
- To reheat, unwrap and microwave for about 30–45 seconds (cover with a damp paper towel to keep it soft).

Healthy Chicken Musubi
Ingredients
- 1 cup sushi rice short-grain
- 1 lb chicken breast or thighs boneless and skinless
- 2 tbsp low-sodium soy sauce
- 1 tbsp rice vinegar
- 1 tsp maple syrup or honey
- 1 tbsp olive oil for cooking
- 1 sheet nori seaweed
- 1 tbsp sesame seeds optional
Instructions
- Cook the rice: Cook the sushi rice according to package instructions, then season with rice vinegar and maple syrup. Let it cool to room temperature.
- Cook the chicken: While the rice is cooling, heat olive oil in a skillet over medium heat. Season the chicken with a pinch of salt and pepper, then cook for 6-7 minutes per side until fully cooked. Let the chicken rest for a few minutes before slicing it into strips.
- Prepare the musubi: Cut the nori sheet into strips (about 2–3 strips per musubi). Lay a strip of nori flat on a clean surface. Spoon a portion of cooled rice (about 1/4 cup) onto the nori. Gently press the rice down with your fingers to compact it, then place a few slices of chicken on top.
- Shape the musubi: Carefully fold the nori around the rice and chicken to form a small, neat package. If needed, use a musubi mold or press to help shape the musubi.
- Serve: Repeat the process for the remaining musubi. Sprinkle with sesame seeds if desired.
What to Serve with Chicken Musubi
Chicken musubi is a snack-sized superstar — but with the right sidekicks, it can totally level up into a full-on meal party. Whether you’re picnicking, lunchboxing, or just musubi-munching at home, here are some tasty pairings to keep things fun and flavorful!
Side Dish Ideas
Balance that savory bite with a few fresh or crunchy companions:
- Edamame – Lightly salted and super snackable.
- Cucumber salad – Tangy, crisp, and the perfect palate refresher.
- Pickled veggies – Carrots, daikon, or ginger bring zingy contrast.
- Miso soup – Warm, cozy, and comforting next to your nori-wrapped star.
- Seaweed salad – It’s green, it’s glossy, and it knows how to party.
Feeling fancy? Add a little fruit skewer or pineapple chunks for a tropical twist.
Dips and Sauces That Pair Well
If chicken musubi had a love language, it would be sauce. Try one of these flavorful drizzles or dips on the side (or right on top — we won’t judge):
- Low-sodium soy sauce – Classic and simple.
- Teriyaki glaze – Sweet, savory, and a little sticky — just like we like it.
- Spicy sriracha-mayo – Mix plain Greek yogurt or avocado mayo with a dash of sriracha for a creamy kick.
- Ginger-sesame dressing – Light, nutty, and adds a fancy feel.
Chicken Musubi is a fun, delicious, and healthier twist on the traditional Hawaiian snack. With its perfect balance of savory chicken, seasoned rice, and crisp nori, it’s a versatile and satisfying meal that can be enjoyed anytime. Whether you’re making it for a quick lunch, a picnic, or a fun snack, this recipe offers a flavorful yet simple way to enjoy a beloved dish with a healthier spin. Ready to give it a try? Let us know how it turns out and feel free to experiment with your own variations! Enjoy your culinary adventure with this tasty treat!
FAQ
Can I Make Chicken Musubi in Advance?
Totally! Chicken musubi is a meal-prepper’s dream.
Make them the night before, wrap them up nice and snug, and keep them chilled in the fridge. They’ll be ready to roll when you are. Just be sure to wait on the avocado or sauces until serving — soggy surprises are no fun.
What’s the Best Type of Chicken to Use?
Team thighs or team breasts? Both are welcome!
- Chicken thighs are juicy, flavorful, and hard to overcook — a solid win.
- Chicken breasts are leaner and great for a lighter bite, especially if you marinate them well.
Grilled, baked, or sautéed — however you cook it, just slice it musubi-style and you’re golden.
How Long Can Chicken Musubi Be Stored?
If you can resist eating them all in one go (you’re stronger than us), they’ll keep in the fridge for 2–3 days.
Just wrap them tightly to lock in freshness and keep the rice from drying out. When ready to eat, a quick microwave zap (about 30 seconds) will bring them back to cozy perfection.